As with anything in life, expertise comes with experience. That’s why we’re here to bring you the top 3 tips to transform you into a Sage Intacct reporting ninja. In...
“If someone is better than you at something, then it’s likely because she has failed at it more than you have. If someone is worse than you, it’s likely because he hasn’t been through all of the painful learning experiences you have.” – Mark Manson
As with anything in life, expertise comes with experience. That’s why we’re here to bring you the top 3 tips to transform you into a Sage Intacct reporting ninja. (And by we, I mean these tips and tricks are brought to you by the great minds of our CLA Sage Intacct Consulting team!).
#1 Report Accuracy Tips:
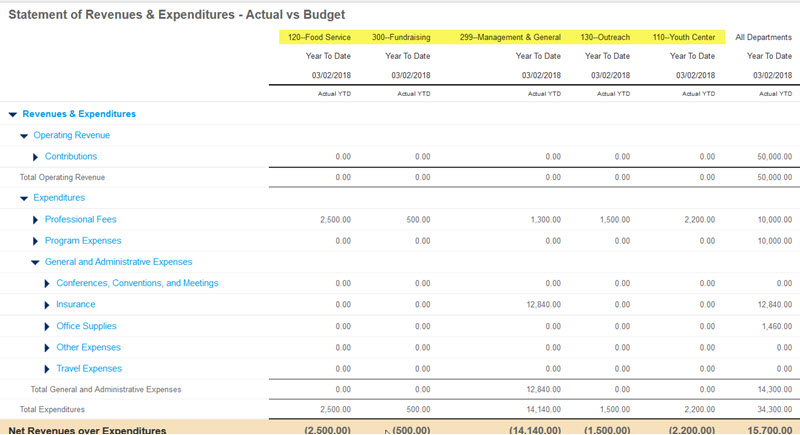
Have you ever run a report and found that it's not correct? Maybe it's your Balance Sheet and unlike its name, it doesn’t balance (how do you call yourself a balance sheet, balance sheet?)
Here are some common reasons for report inaccuracy:
- Missing Accounts from Reports
- Dimension Filters on Account Groups or Reports
So how do you identify the problem?
First, let's figure out whether you're using QuickStart Financials or Custom Built.
QuickStart Financials?
TIP #1: Check For QuickStarts
Go To: Company > Company Information > Accounting Tab
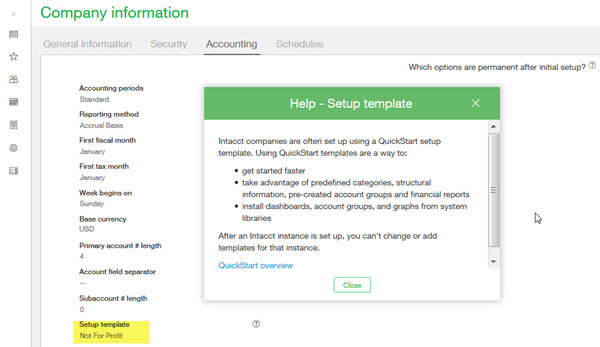
A setup template here indicates you have QuickStart Financials enabled.
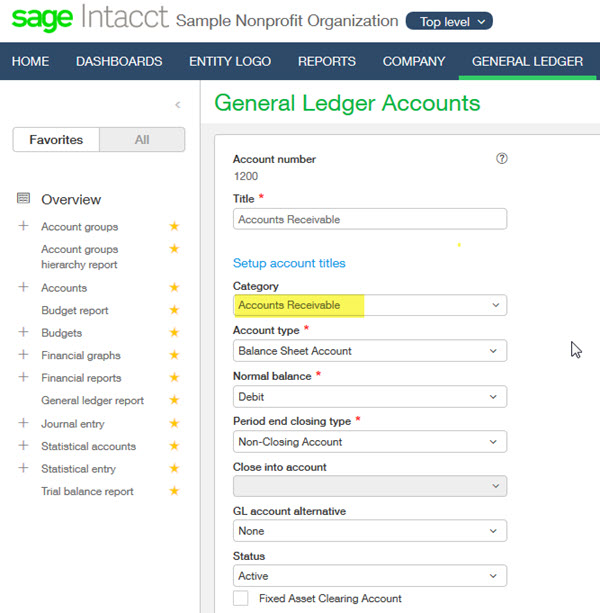
TIP #2: Check Categories on Accounts
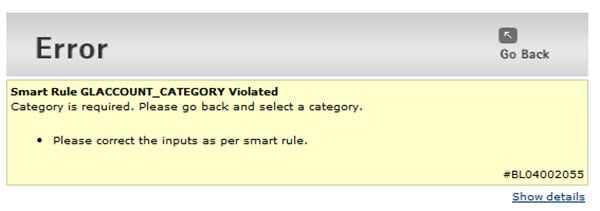
If you are using QuickStarts, check that all accounts have a category assigned. If no category is assigned, the account will be missing from your QuickStart Financials.
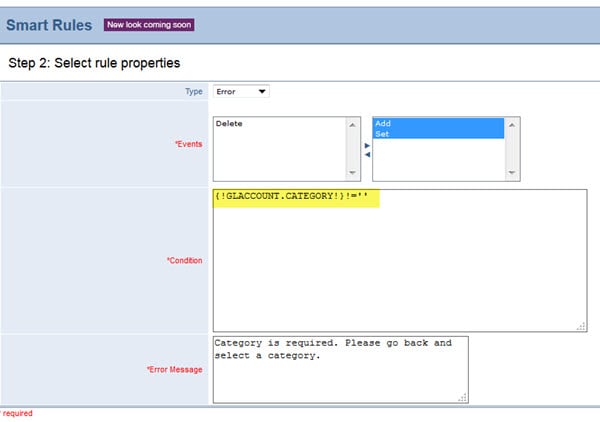
TIP #3: To Prevent This In the Future
Not using QuickStarts?
Don't worry! You're not out of luck. We've got some tips for you too.
TIP #1: Identify Any Missing Accounts
A la carte methods (pick your favorite(s) from A, B, and C listed below) to check if all accounts are included.
- Show All Accounts on the Report
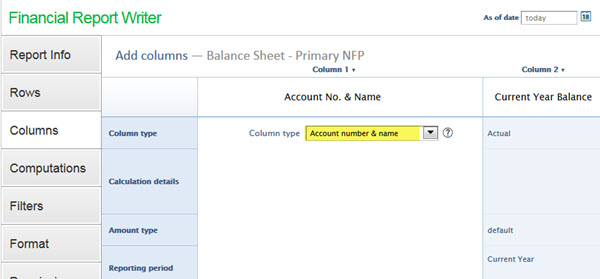
- Columns Tab: set Column 1 to display Account number & name
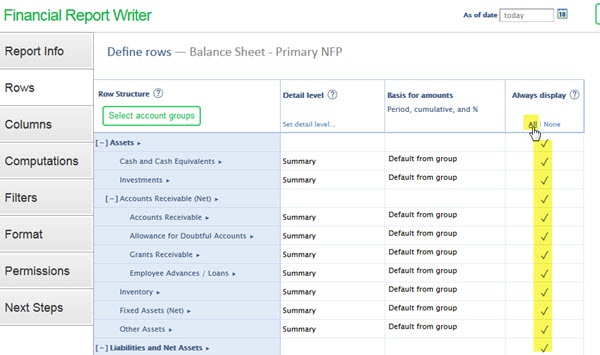
- Rows Tab: Click the All button in the Always Display Column
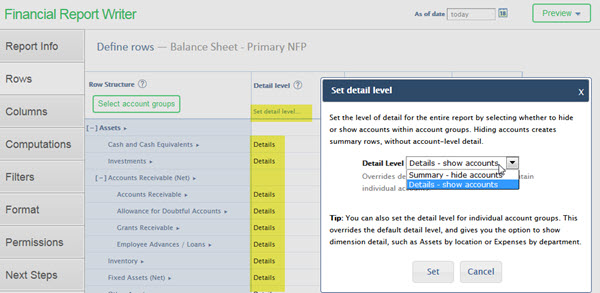
- Rows Tab: Click the Set Detail Level... link > Detail - show accounts > Set
- Export: to Excel, Export your COA to Excel, then create a vlookup in your COA to check that all accounts are included that should be.
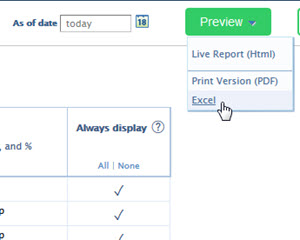
- Columns Tab: set Column 1 to display Account number & name
- Use the FlipView in your Account Groups to
- Go To: General Ledger > Account Groups > Click Flipview
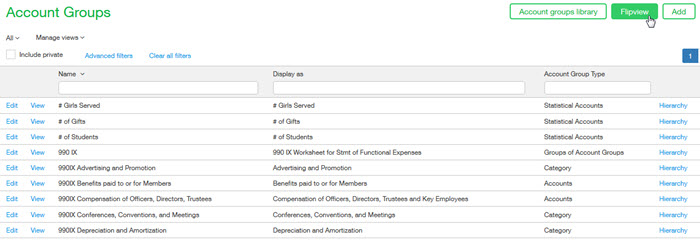
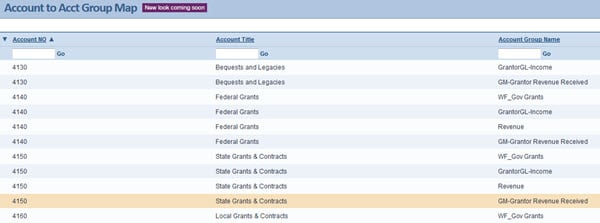
- Go To: General Ledger > Account Groups > Click Flipview
- Export the top level Account Group Hierarchies and Vlookup to your COA
- Rows Tab: Hover over the top-most account groups and click View (in the case of this Balance Sheet example, do this for both the Assets group and Liabilities and Net Assets group)
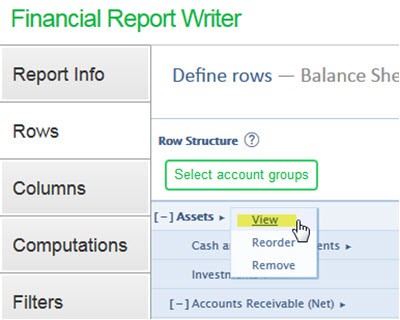
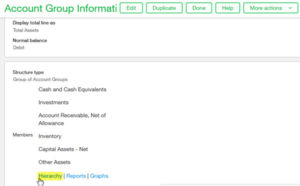
- Account Group: Click Hierarchy
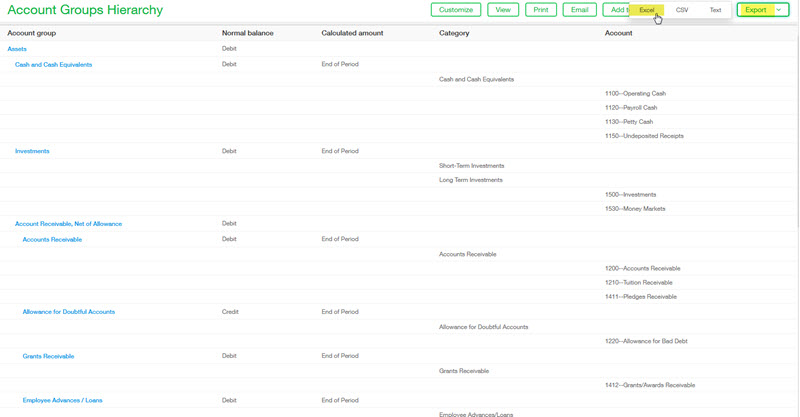
- Export: both hierarchies and export your COA. Vlookup to check that your account group includes all accounts from your COA. Also, you can quickly scan the hierarchy to see if the Normal Balance or Calculated Amount are incorrect.
- Rows Tab: Hover over the top-most account groups and click View (in the case of this Balance Sheet example, do this for both the Assets group and Liabilities and Net Assets group)
TIP #2: Check for Dimension Filters on Accounts
Check if any of your account groups are being filtered by a dimension. Did I hear you think, how? Just pick your favorite method of the two listed below.
- Export the Account Groups Members to check for dimensional filters
- Go To: General Ledger > Account Groups > Export

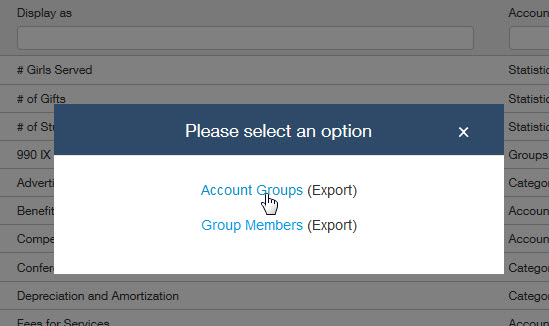
- Click Account Groups
- Go To: General Ledger > Account Groups > Export
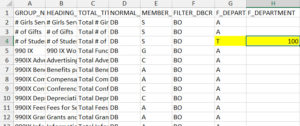
- Notice that anything with a "T" in any of the "F_" columns has a filter and the filter is identified on the column to the right. (Ex: The below report is filtered on department 100).
- Create a few reports to tie statements that just include all revenue and expenses
#2 Report Formatting Tips:

TIP #2: Copy Report Formatting
If you like the spacing, layout, visual appearance of your report, no need to format each report the same way, just steal it from the report you like!

TIP #3: Review PDF
Review reports in PDF before finalizing. Best way to see the *true* formatting and make sure your reports sparkle!
#3 Account Group Building Tips:
TIP #1: Map and Plan
Plan out your reports in Excel before you build them. Here's a sample template I like to use:
TIP #2: Build Your Account Groups for Ranges
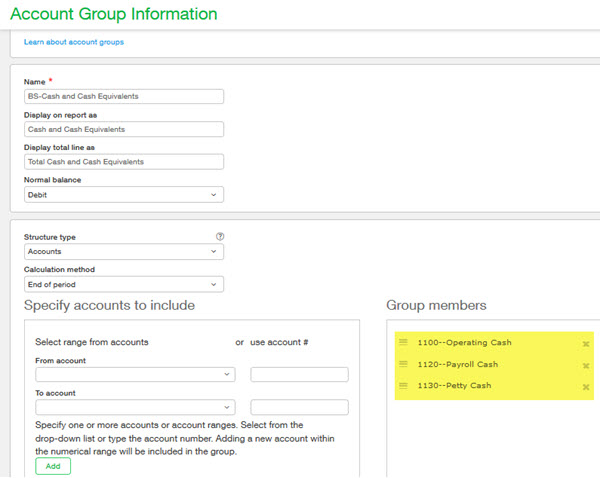
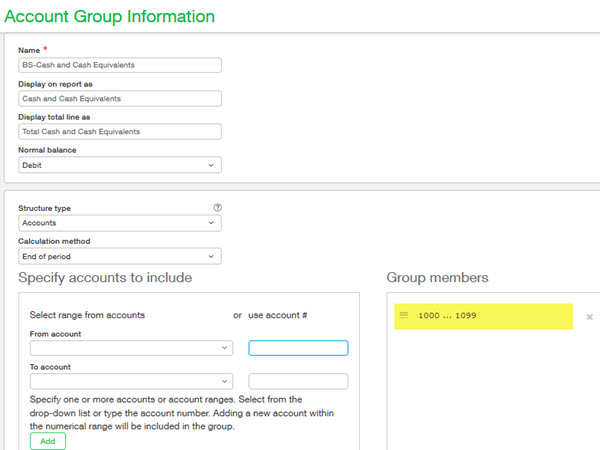
For example, you may have 3 bank accounts when you go-live on Intacct (maybe 1010, 1020, and 1030), but you should build your Cash and Cash Equivalents group for the entire range up to your AR account (maybe 1100). This way, when you set up a new bank account: 1040 it's already in the right group and in your reports! (And while that makes me sad because you'll probably never visit this post again, it means you really are a report writing ninja).
- Instead of this:
- Use this:
TIP #3: Name Your Account Groups Wisely
Notice how I names my account groups starting with "BS-" in the screenshot above? That's because when I go to my list of account groups, I'm easily able to find all account groups that make up my balance sheet by simply typing "BS-" and that makes life SO much easier!
Want even more report writing help, tips, or tricks? Reach out to us here!
Contact us
Want to learn more? Complete the form below and we'll be in touch. If you are unable to see the form below, please complete your submission here.

