
In our last post, you may recall we mentioned a new bank transaction assistant file import process released with the latest Sage Intacct R2 2024 product release o...
In our last post, you may recall we mentioned a new bank transaction assistant file import process released with the latest Sage Intacct R2 2024 product release on May 10th. We mentioned this new process would create bank transactions just like the bank feed integration. Don’t worry, the CSV file import is not yet in danger of being retired. However, now that the new release is here with its additional supported file formats OFX, ASO, QIF, XLS, and XLSX, you may find that one of these formats allows you to export your bank file without having to manually manipulate it, making your bank reconciliation that much more efficient. Today, we’ll walk through how you can test the new import process in your sandbox company.
Note: Once you have used the new bank transaction assistant file import process, you are essentially married to it, for better or worse, and can no longer utilize the old CSV file import, so we recommend a sandbox test run first. You can, however, in the future connect the bank using a bank feed.
Step 1: Enabling the functionality
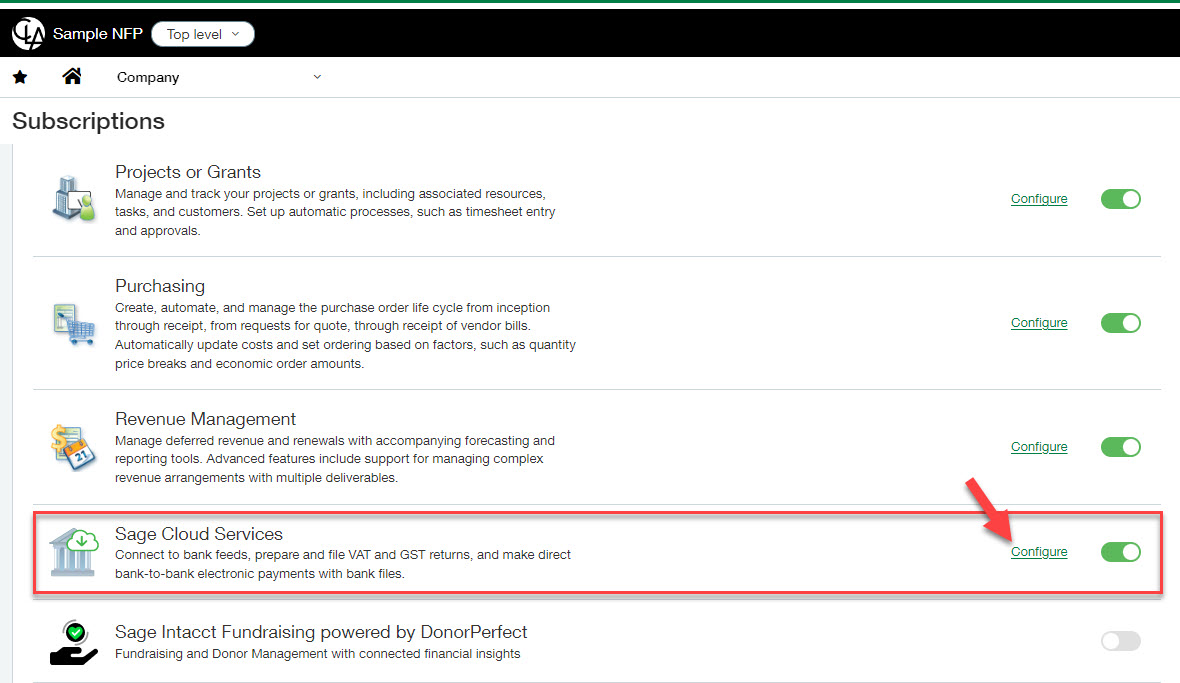
- Go To: Company > Admin Tab > Subscriptions
- Select Configure for Sage Cloud Services
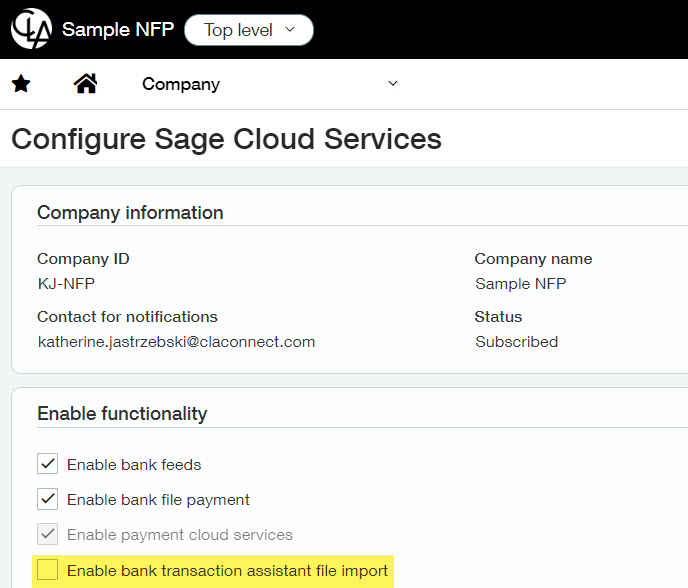
- Check the “Enable bank transaction assistant file import”
Step 2: Permissions
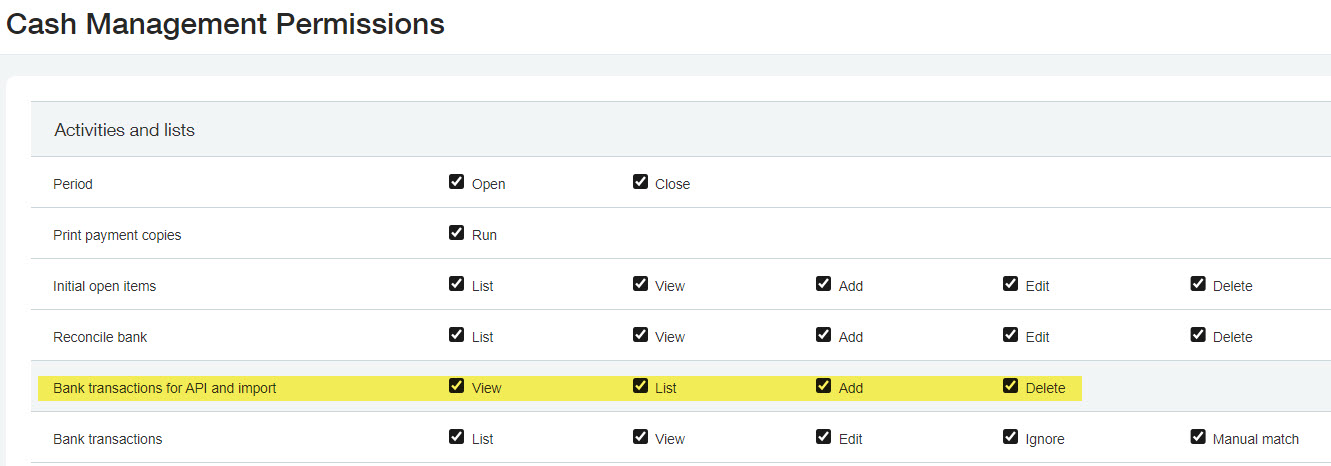
- Confirm you have the following permissions in Cash Management:
- Bank Transactions for API and Import: View, List, Add, Delete
Step 3: Import your file
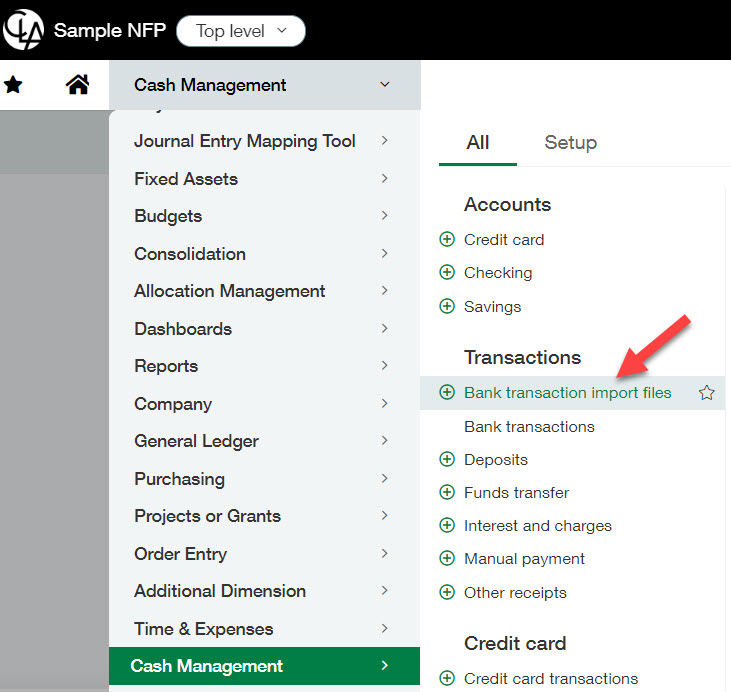
- Go To: Cash Management > All Tab > Bank Transaction Import Files
- Select the bank account for which you would like to import transactions
- Select the following:
- File type – In my example I am using an OFX filetype
- Select your file – Drag and drop your bank file or click to open
- Select the order the date is displayed in your file – month day year, day month year, or year month day
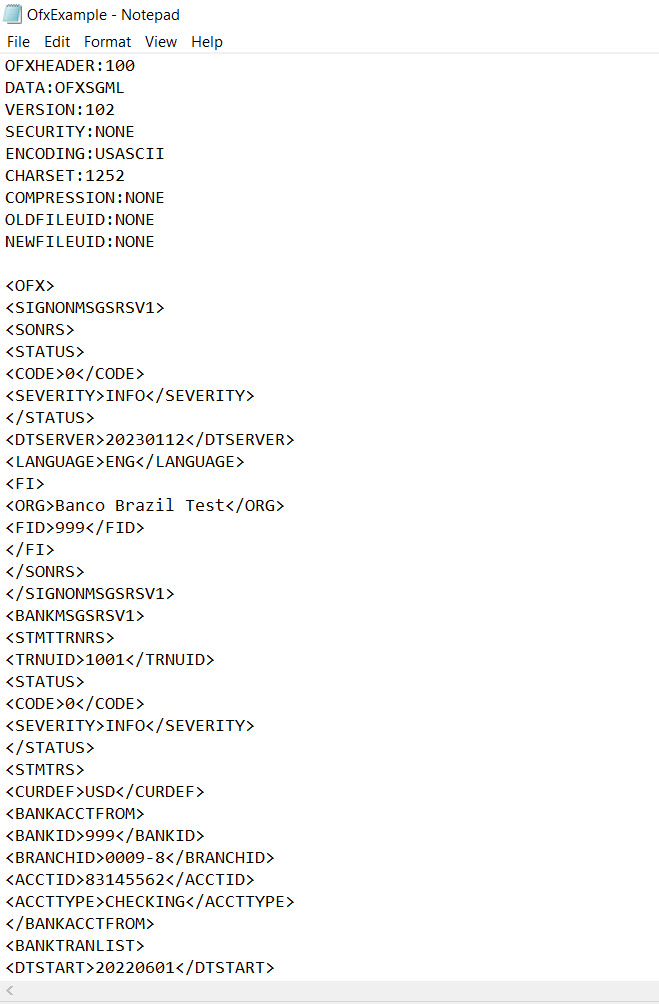

- Select Upload file
- Select the transaction type – Intacct displays a single transaction contained in the file and ask for confirmation whether the transaction is for money into the account or money out.
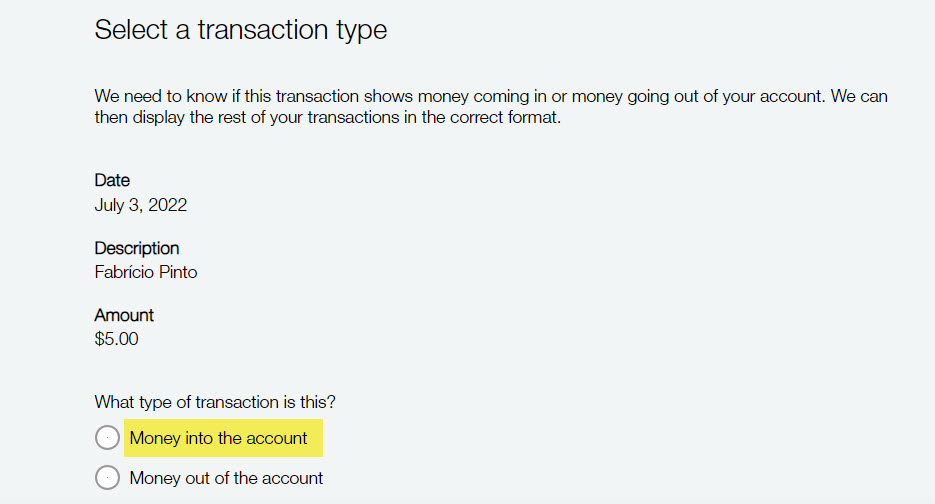
- Select Verify
- Review your transactions and select import transaction – Intacct will display a list of all transactions contained in the file for you to preview prior to importing. At this step you can also go back to swap the transaction type.
- As Intacct processes the file which takes a few minutes, you can view the status of the file in the Bank transaction import files list view

Step 4: Matching and Creation Rules spring into action
Find all imported bank transactions by navigating to Cash Management > All Tab > Bank Transactions. Also, once imported any matching or creation rules applied to the account will either match against existing Intacct transactions or create a new journal entry and match.

Deleting Bank Transactions
Need to delete all bank transactions that were just imported? Perhaps a file was imported twice by mistake. Delete all bank transactions at once by selecting the file and the Delete button.

If transactions within the file created a journal entry via a creation rule, it will not be deleted automatically. They must first be deleted manually prior to deleting the file.
Transactions matched via the import will automatically be unmatched and bank transaction deleted.
What’s Next
Finding it difficult to keep up to date with all the new releases related to Sage Intacct bank reconciliations? Subscribe to the blog for future updates! Now that you’re no longer spending time manually manipulating bank import files, join us as we dive into another often time-consuming month-end process, Dynamic Allocations, on March 28th.
The post Sage Intacct’s New Bank Transaction Assistant File Import appeared first on Sage Blog.
Want to learn more? Complete the form below and we'll be in touch. If you are unable to see the form below, please complete your submission here.Contact us
